
Special notice for Gravity Forms users
From version 2.5 Google Analytics Tracking Form Forms has built in support for Gravity Forms.
Selecting your forms and the fields to hold your tracking data is now super simple, see the screen shots below for more information.
Getting Started
Ensure you have Google Analytics working on your website, this plugin requires that you’re already using Google Analytics to track visitors. If you’re looking for a WordPress plugin to do this we recommend this one – Google Analytics for WordPress.

- Install our Google Analytics Tracking for Forms plugin
- Activate your plugin, use licence key received after ordering the plugin
Choose how you’re going to use the plugin
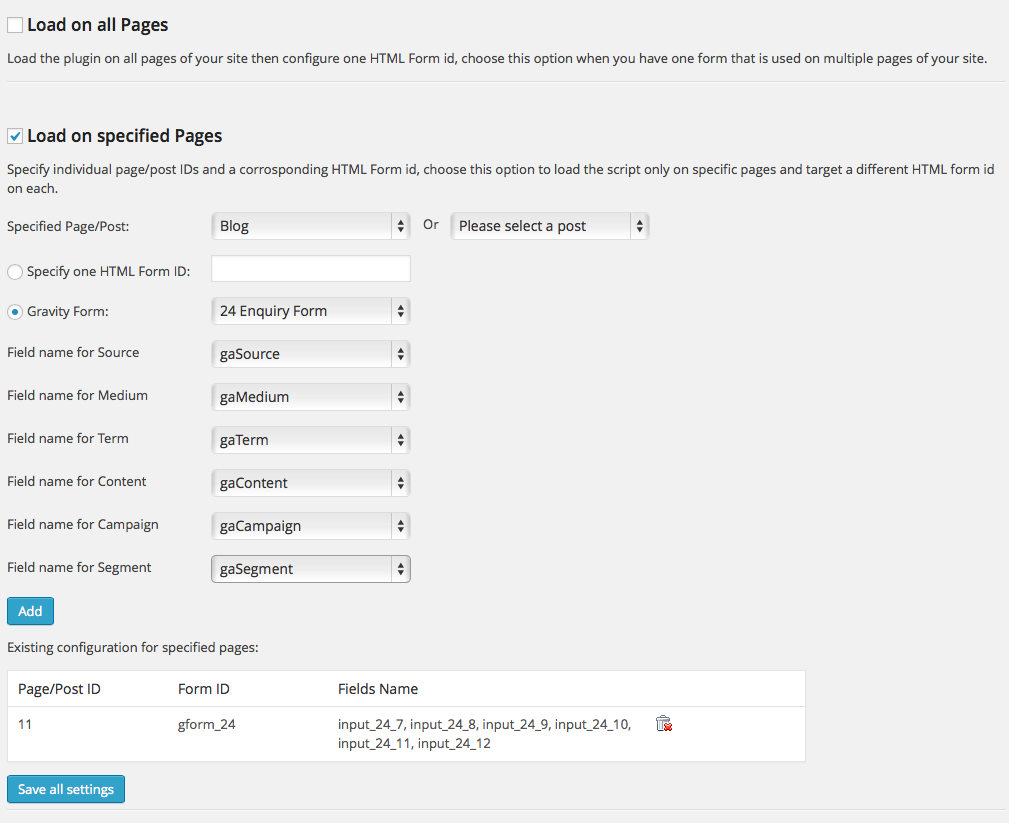
Plugin settings click to view larger
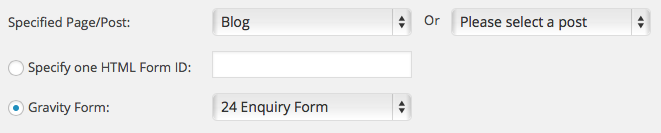
There are two ways to use the plugin. Option 1 is very straight forward, if you have one form that appears on one or more pages on your site this will be the best option.
Alternatively, Options 2 allows you to target individual WordPress pages or post with a specific form that appears on that one page.
Interface for Gravity Forms users
Version 2.5 of our plugin now gives users of Gravity Forms an even easier way to configure the plugin. Simply choose a Gravity Form, then the fields in that form will display, allowing you to select the fields to hold the tracking data. Click the settings page screen shot here for a preview.
Specify the ID of the form
For users of other form plugins, or HTML forms, in order to target a specific form you need to enter the ID of the form, so looking into the HTML source of you page you will see code like this example:
<form id="gform_1">
NB. Your form must have an ID for it to work with this plugin.
Specify your form field names
Generally what you want to do is have a form (e.g. an enquiry form) and add some hidden fields to that form to carry through this tracking data.
You can choose to add up to six fields to capture:
- Source
- Medium
- Term
- Content
- Campaign
- Segement
To map the fields from your form you need to specify the name attribute for the field.
So if the HTML for your field looks like this:
<input type='hidden' name='foobar'>
… it is the name foobar that you need to enter for that field.
Move through and map each field.

Click Save Changes and then you will be ready to test your hidden fields with the URL Builder. Access your site with the Google built URL then complete your form, if everything is working you will see the google data sent through your form.
Some people experience problems when testing as they have Google Analytics configured to not track logged in or admin users, so be sure to test in another web browser where you’re not logged into WordPress.
Tracking multiple forms
If you have a need to track specific forms on individual WordPress pages or posts, use option 2 and this becomes possible.
You can choose an individual WordPress page or post then select the form that is to be targeted for that page / post.
Again, users of Gravity Forms can simply select the form, other forms can be targeted using their HTML id.
Using this option then allows you to map different form fields for each specific page or post.
A working example

a working example
Here is a screen shot from a form setup on a site, the form collects enquiries for users wanting WordPress websites. Along with the normal form fields of name and email etc.. you can see the hidden fields passed through from this plugin; the user originated from an organic Google search for the term “WordPress experts”
More Help?
We operate a support forum for this plugin, please visit it here Support.HelpForWP.com.
Lottie Player for WordPress is here!
Lottie Player adds support for Lottie files in your WordPress website. Upload and manage Lottie files directly within your WordPress dashboard, then embed the lightweight Lottie animation on the front end of your website using a block or via a shortcode.