We use the Zoho authentication system to connect our WordPress plugin to your Zoho CRM account. In this help tutorial we’ll show you a step by step walk through. This walk through has been updated July 2020 to show the new process for Zoho CRM.
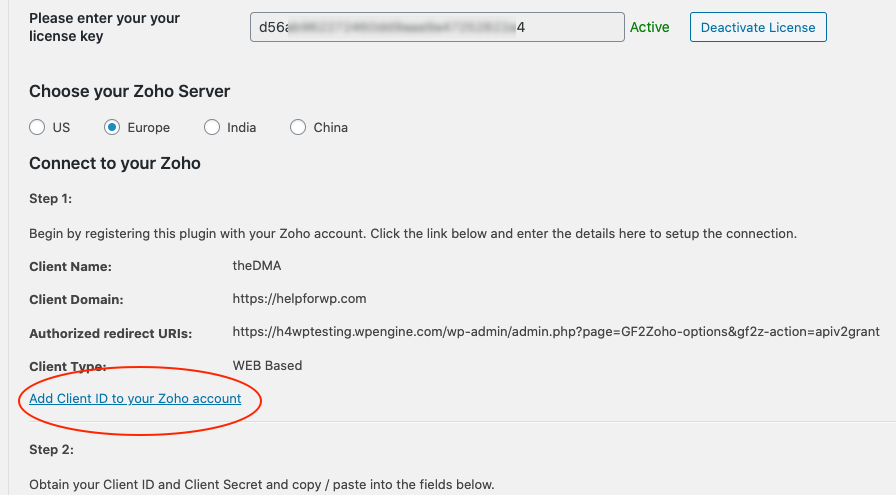
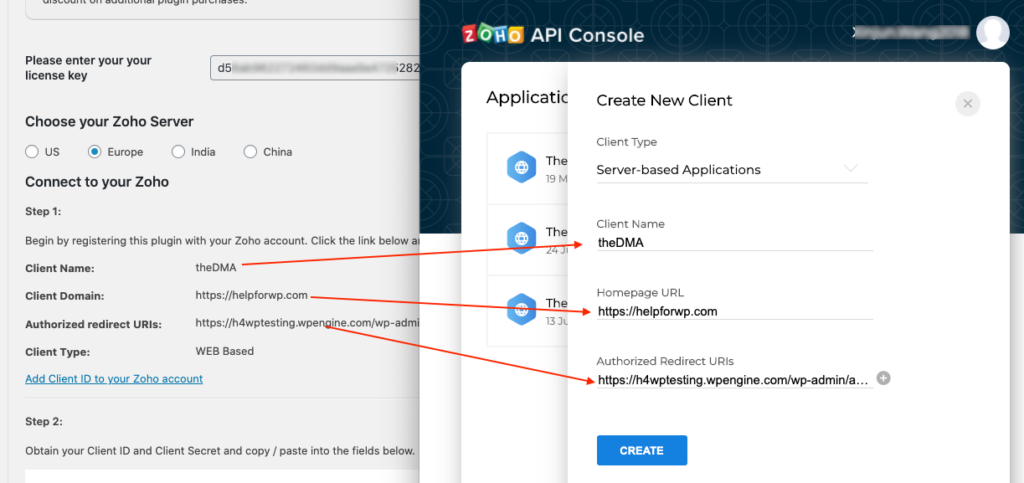
Begin by choosing one of the global data centres, where your Zoho account is configured (US, Europe etc..). Then click the link shown in the screenshot below.
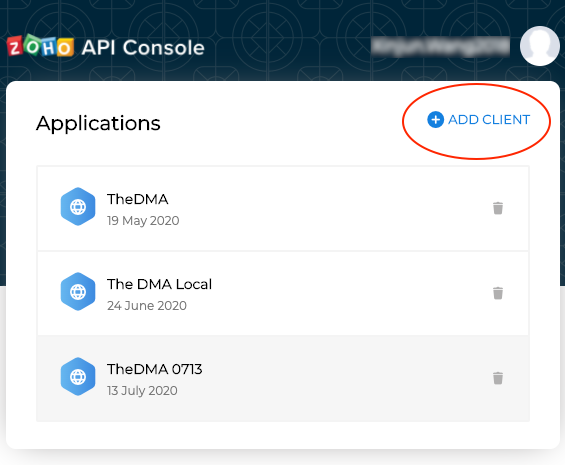
This will open the Zoho API Console. Here look for the option to ‘add a client’.
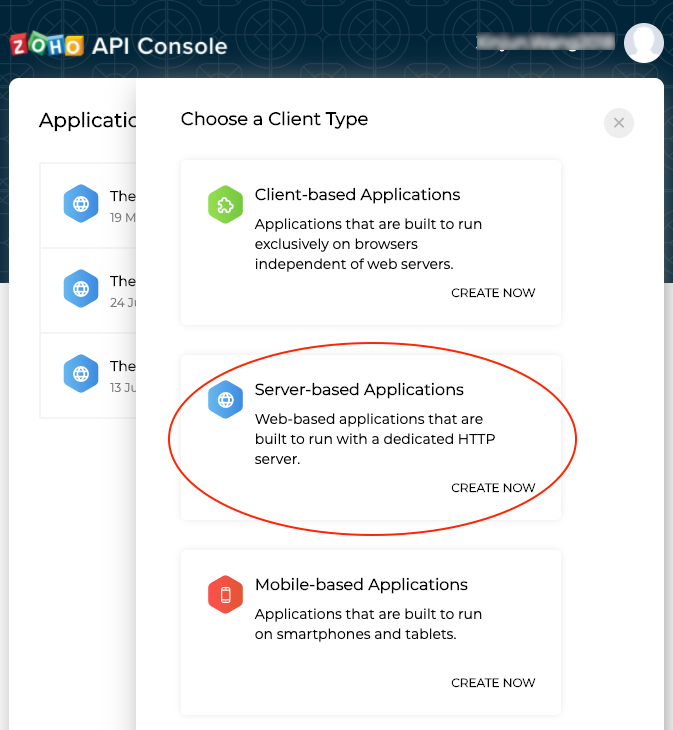
Next you should choose “Server-based Applications”.
Now refer back to your WordPress installation, on the setup screen copy and paste the information for the following fields:
- Client Name
- Homepage URL
- Authorisation Redirect URLs
When you’re done click “Create”.
Note, what you see in the setup screen may differ slightly from the screenshot below.
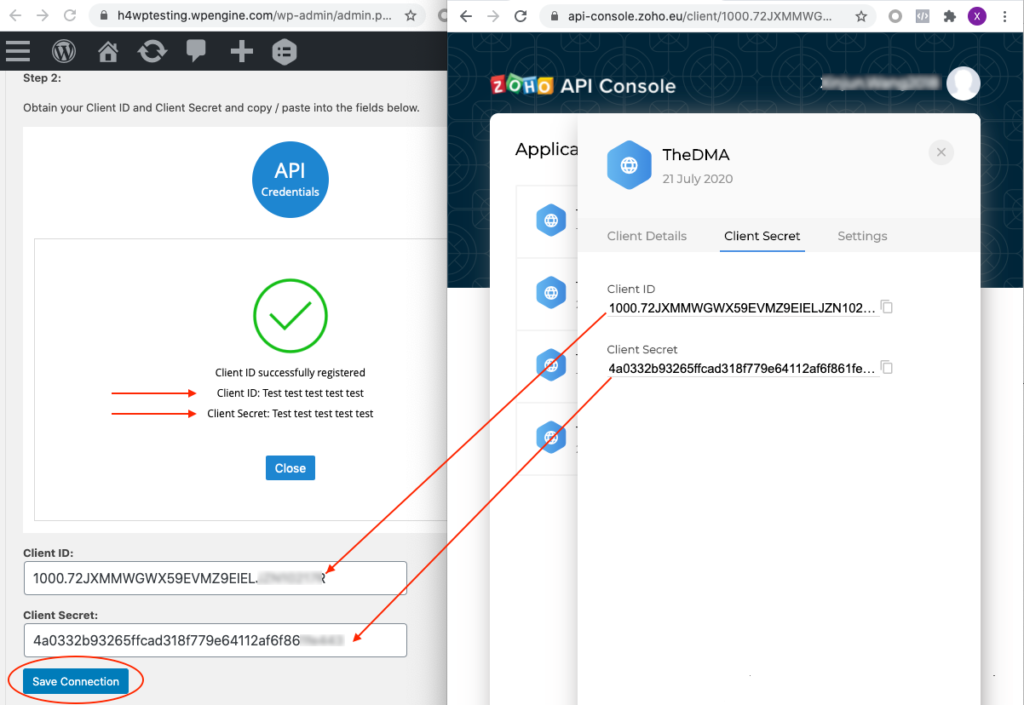
You will then see the below interface. From here copy the Client ID and Client Secret and fill in on the plugin setup screen.
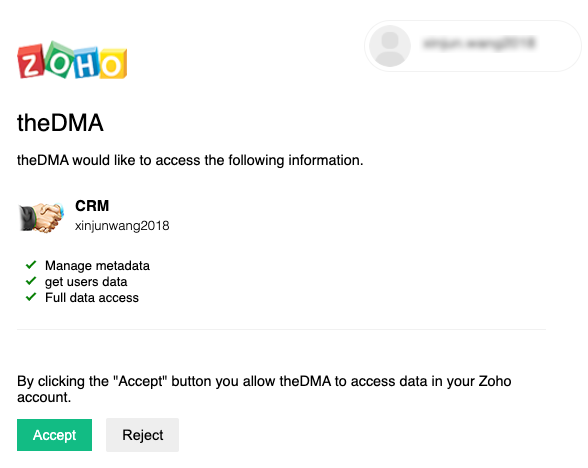
Click Accept on the next screen to all the plugin and your WordPress installation to access your Zoho CRM account.
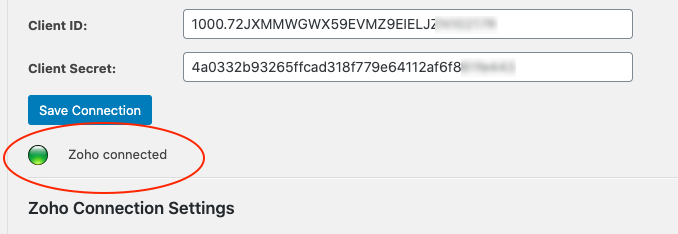
You should now be returned to the WordPress dashboard, where you will see the green icon confirming that Zoho has been connected.
