Posted by Peter
10 July 2015This tutorial is for version 1.x of our plugin. Version 2.x has a different method to set the deal stage.
Send deals to a specific stage in your pipeline
The Pipeline of a deal will be assigned automatically based on stage_id – so what you need to do is set stage_id to your deal.
Login to your Pipedrive account and visit the Settings page.
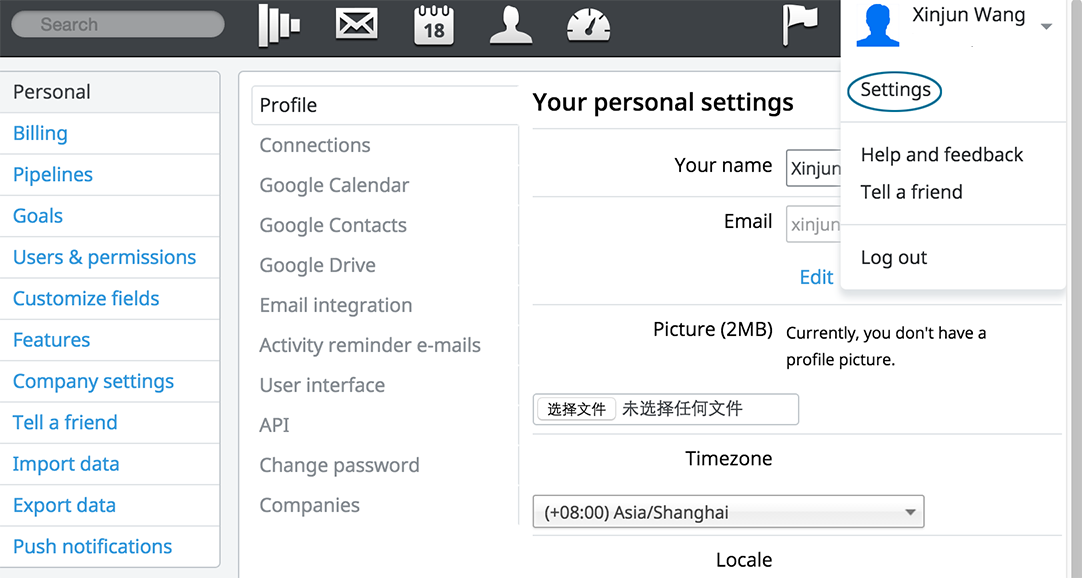
Click on Pipelines to see all of your pipelines that are setup.

Move your mouse to a stage, you will see in the bottom of your browser window a stage ID.
The screenshot below shows a close up of this ID. It will be different for each stage that you have configured.
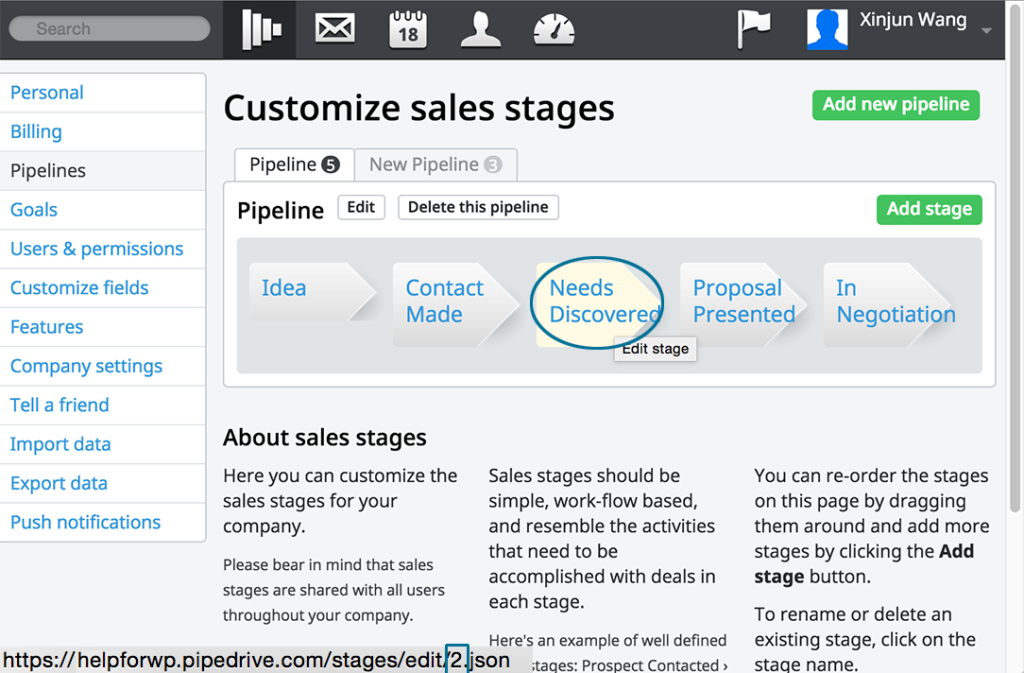
You will see X.json in the url end. X is the stage’s ID.
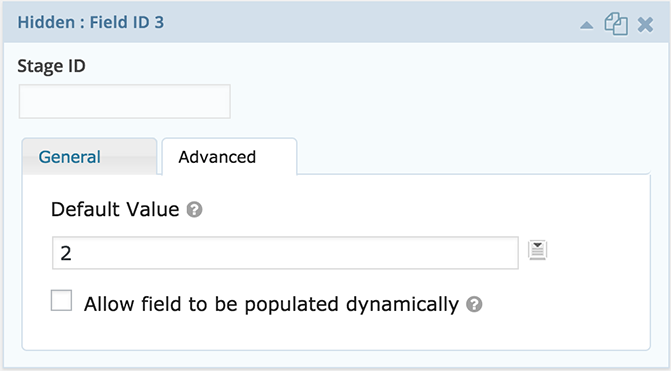
In your Form create a hidden field with name “Stage ID”, set the default value to the stage ID you found above.
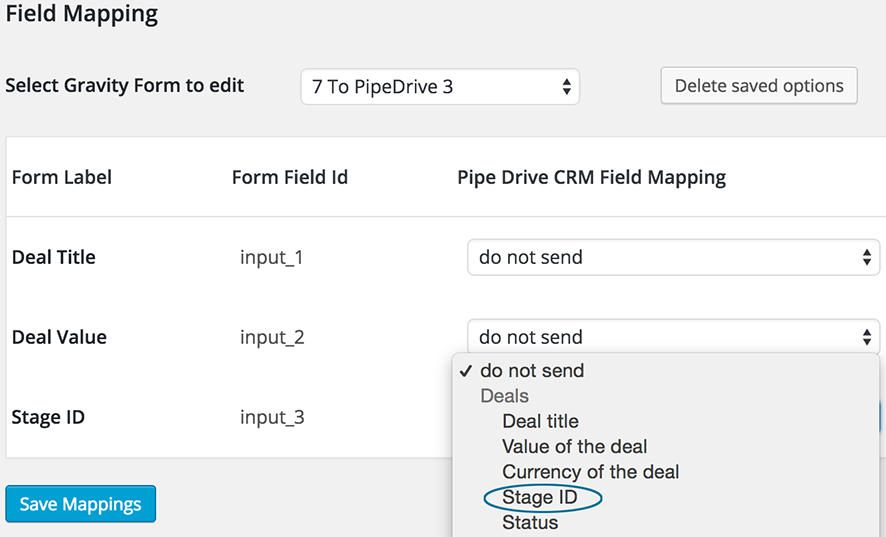
Visit the plugin mapping page and now map the new hidden field to Stage ID.
Send deals one one pipeline or another based on user input in your form
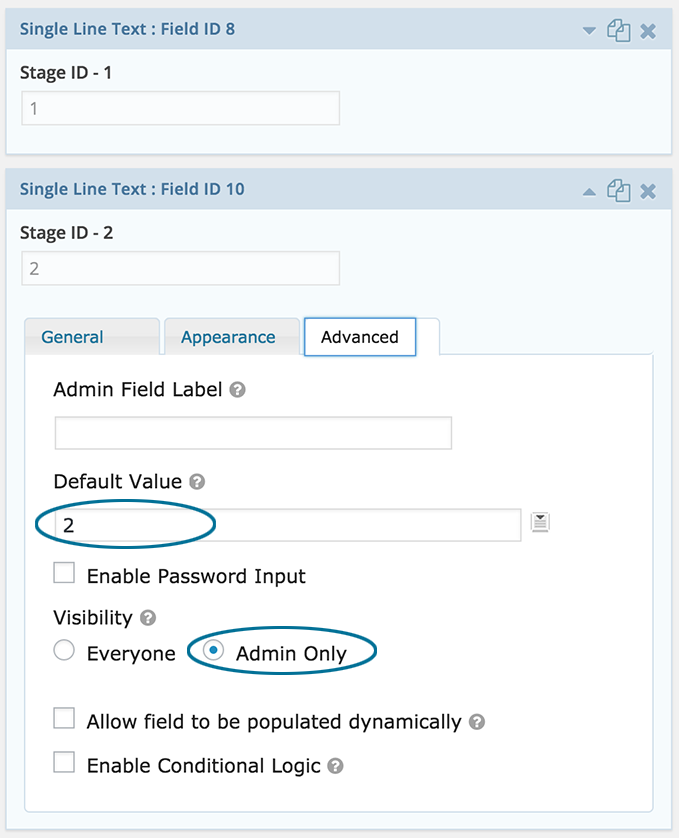
In your form create a number Single Line Text fields with name “Stage ID – 1”,“Stage ID – 2”etc..
Set default value to stage id that you got from your PipeDrive account. See above tutorial for help on how to find the stage ID in your Pipedrive account.
Set Visibility to “Admin Only”.
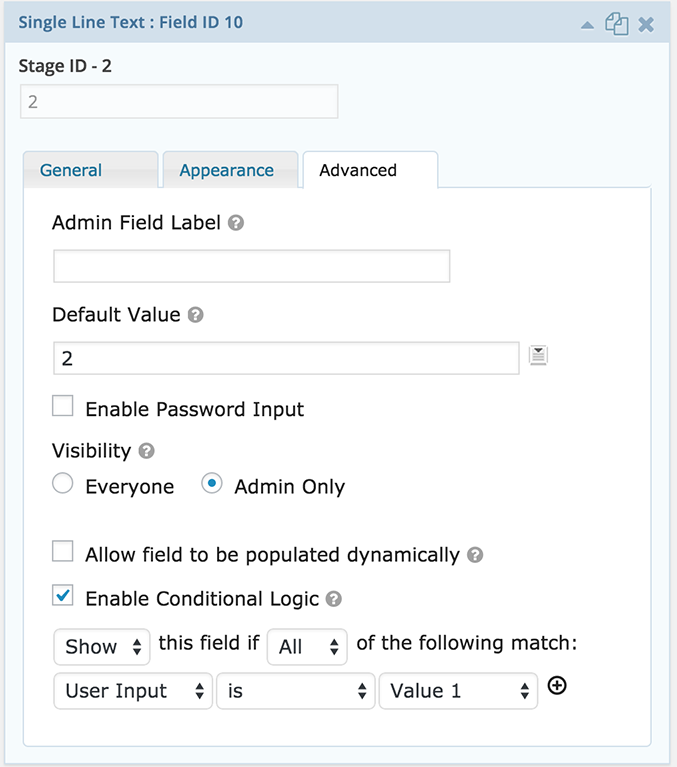
Enable Conditional Logic to fields you created above, set them show base on one field. This might be a drop down field that has your product types, services or perhaps which state or country the users is in.
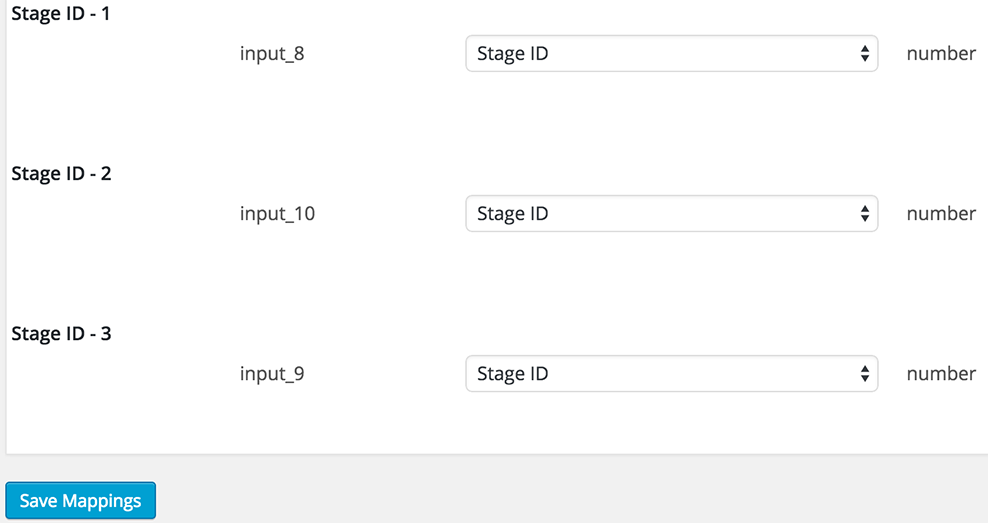
Now when mapping your form, map each of the hidden fields to the Stage ID.
Lottie Player for WordPress is here!
Lottie Player adds support for Lottie files in your WordPress website. Upload and manage Lottie files directly within your WordPress dashboard, then embed the lightweight Lottie animation on the front end of your website using a block or via a shortcode.